Saturday, May 30, 2015

Rehearsal Dinner Deconstructed: Odds and Ends

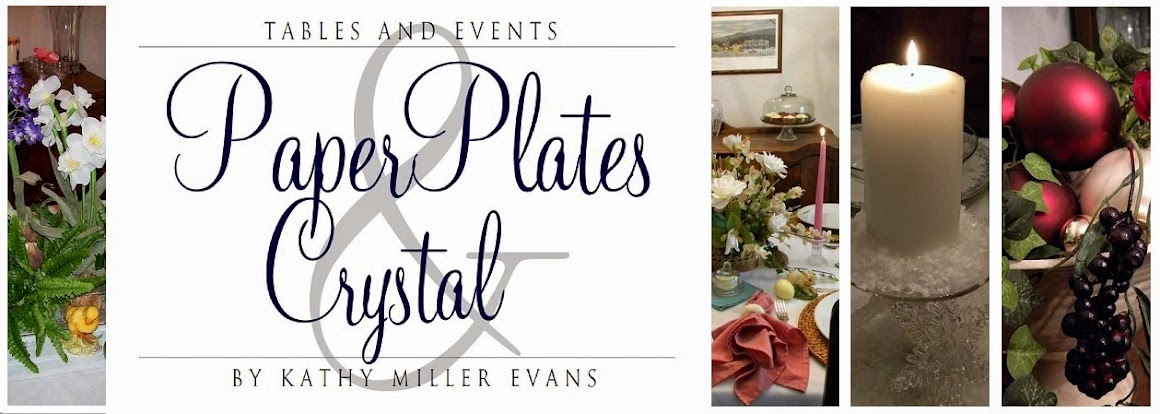
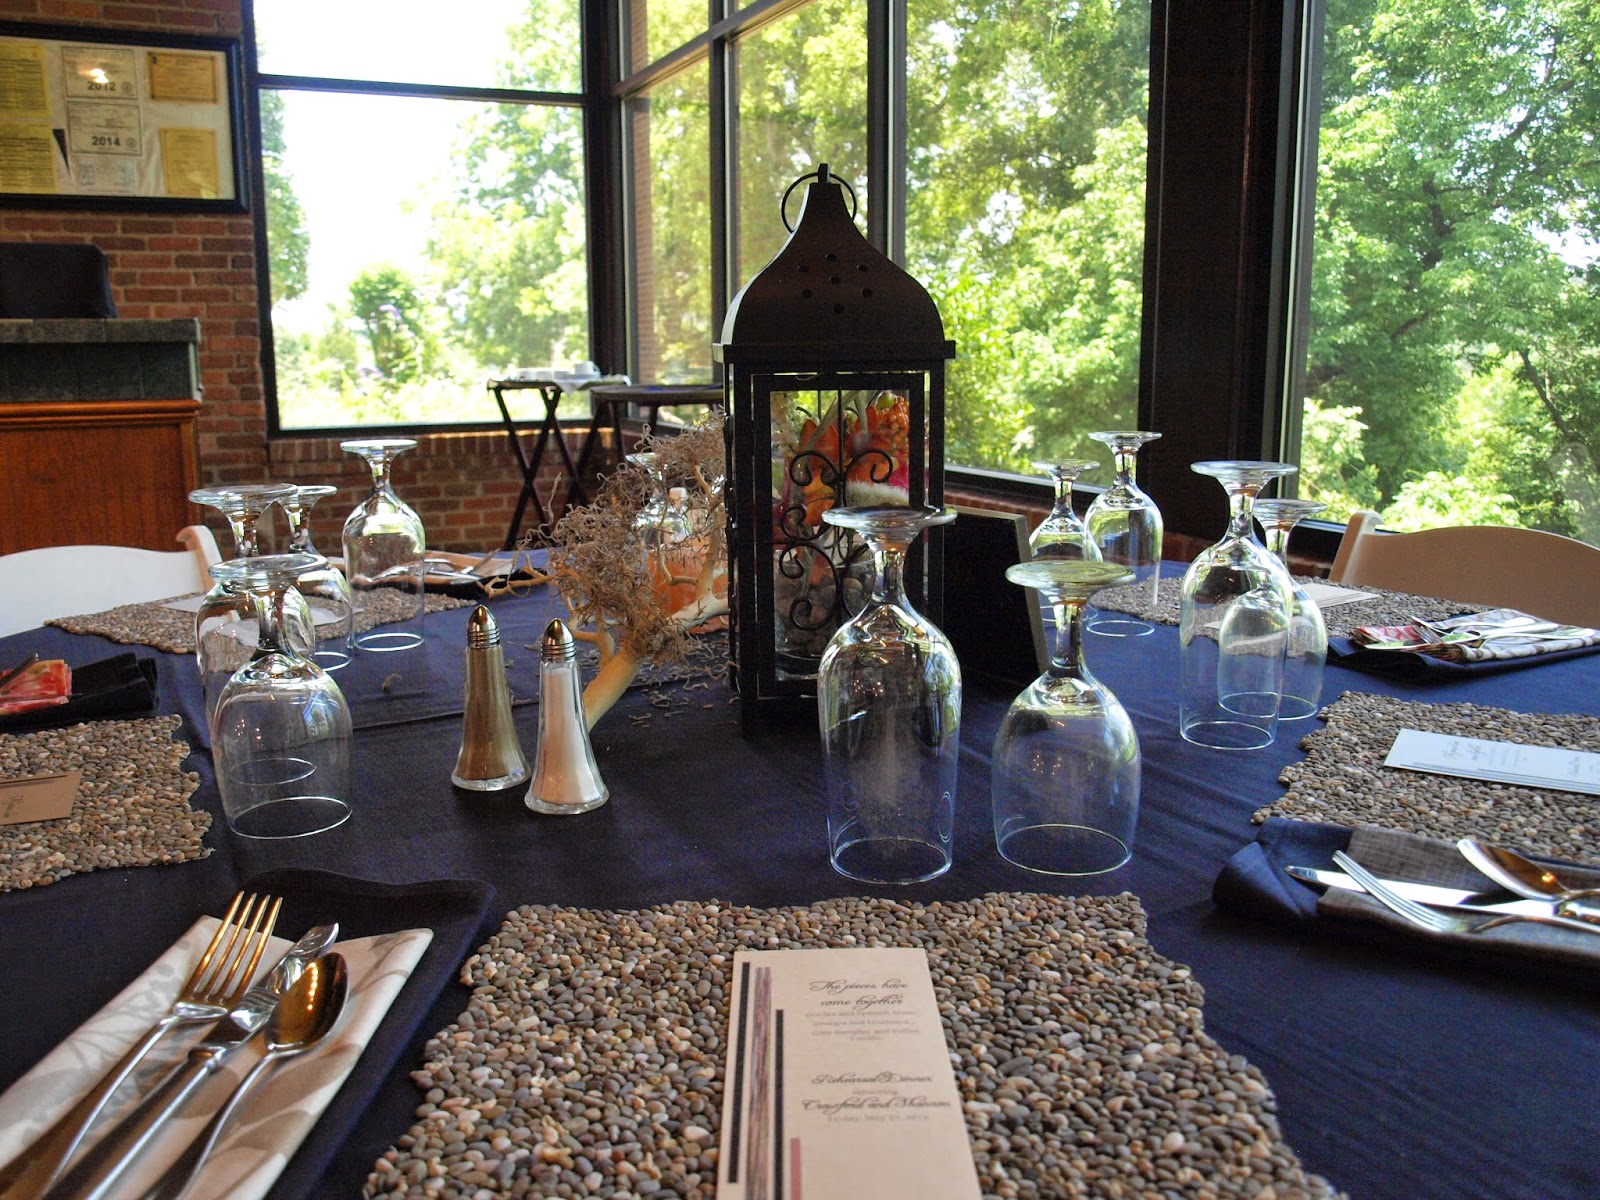
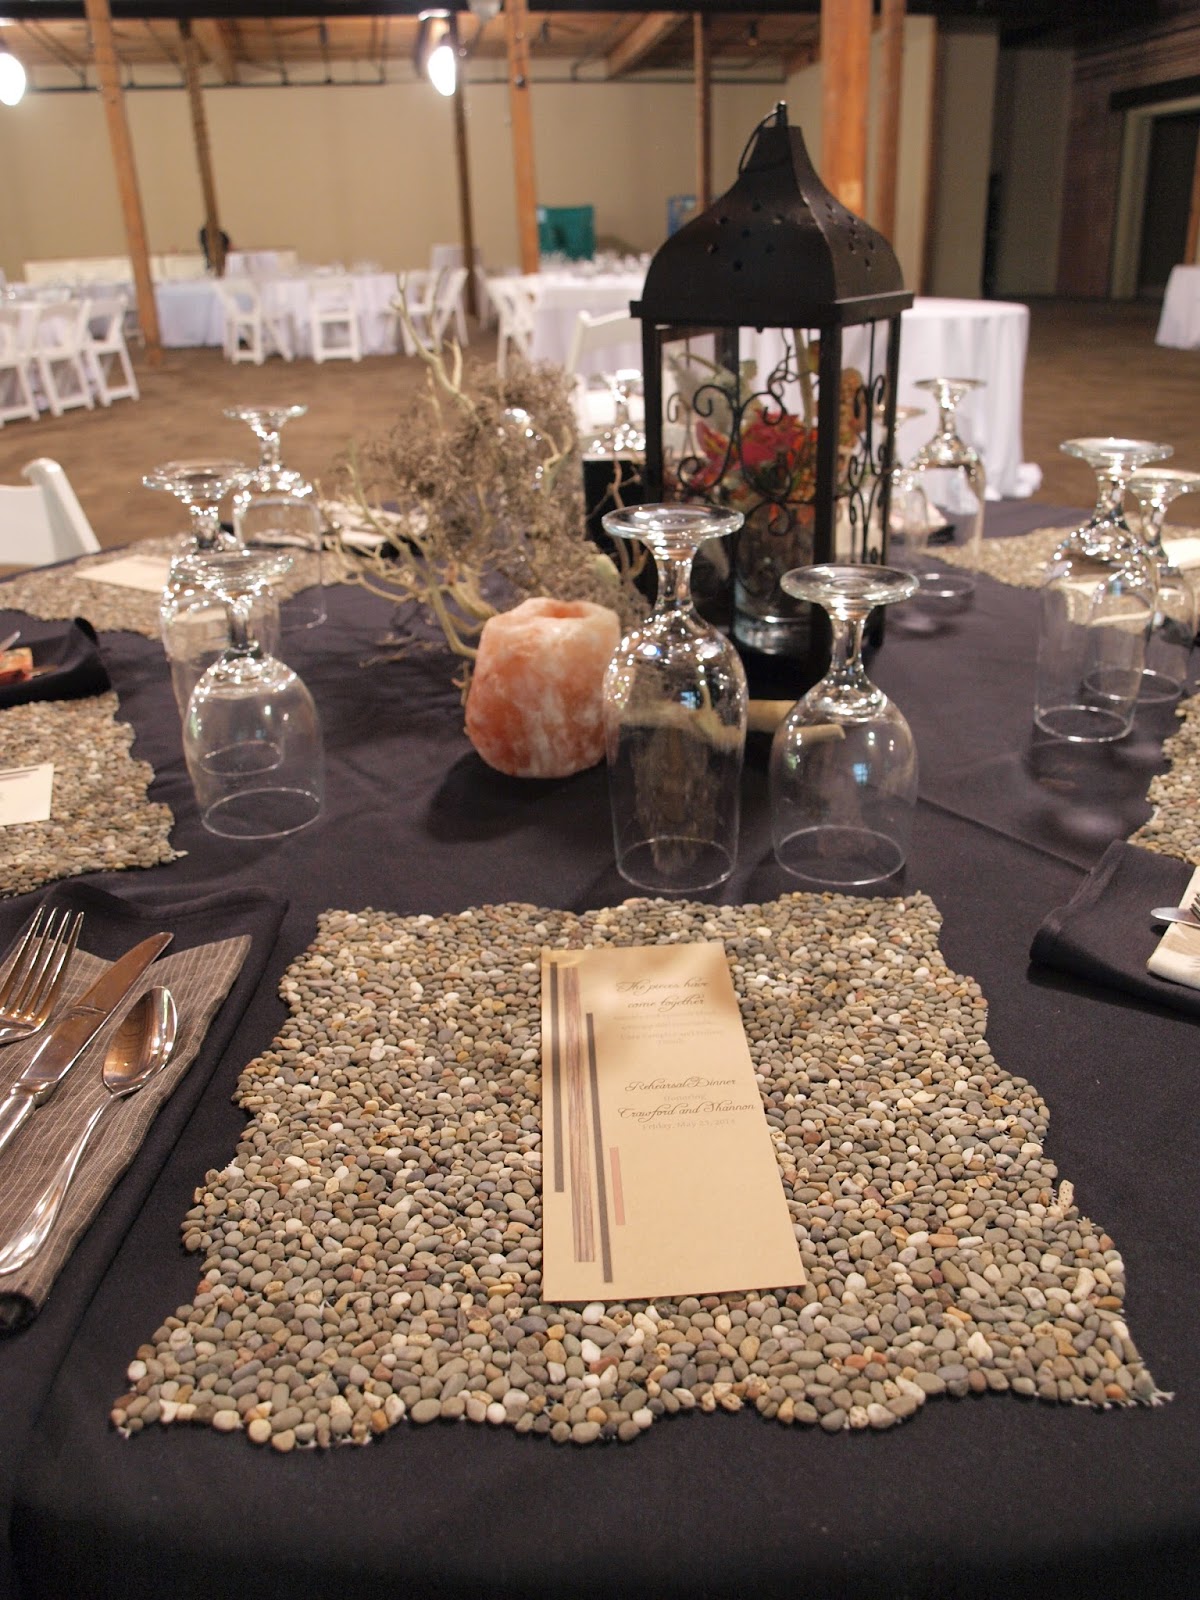
The last area to consider in the rehearsal dinner space were the tables set up to hold messages for the bride and groom and take-home favors for each guest. The same decor elements were used for this table as were used for the dining tables. As you will see from the pictures, the manzanita branches were standing vertically instead of horizontally since conversation at this table would not be an issue.

By placing two rectangular tables end to end we accomplished two goals. The first was to break up the spaces between our area and the area already set up for another event the next evening. The second was to represent both a beginning (messages to the couple beginning their married lives together) and an ending (a set of slate coasters for each guest to take home at the end of the evening).  
                       
At one end of the table, rocks and permanent markers were provided for guests to write messages, words of advice, etc., to the bride and groom. This activity also took the place of a traditional guest book. The inscribed rocks were placed in a clear vase for the couple to take home.

The opposite end of the table held sets of four slate coasters for each guest to take home as a remembrance of the evening. The mother of the groom made the coasters with slate tiles, placing self-adhesive felt tabs on the bottom of each tile. The tiles had veins of the peachy-coral and green colors found in our color palette.  Perfect!

Additional touches of our decor elements - Spanish moss, manzanita branches and lanterns - were placed around both the inside and outside dining areas.

Inside, small lanterns were hung in the window-like wall that separated the cafe and large dining area. Manzanita branches, moss and lanterns were placed on each side of the cafe entrance.


Outside, these same small lanterns and some moss were placed on every other stair leading from the rehearsal site up to the porch.

In addition to the stair lanterns, the railings along the stairs and porch were wrapped with fairy lights and then hung with moss to soften the effect.

The evening ended with guests learning some Cajun dance steps and riding the trolley back to the hotel.


I will conclude this series next time when I post some final thoughts.  

Wednesday, May 27, 2015

Rehearsal Dinner Deconstructed: Centerpieces And Table Settings

"Would it all fit?" Yes, it did! AND...with a little room to spare! A few more things were added after this picture was taken, but we made it happen. Several hours later we arrived in Columbus, GA, ready for a good night's sleep. There would be much to do the next day.

When we arrived at the venue the next morning we were met with a familiar sight. The truck driven by the father of the groom was just as full as our vehicle was. We were not looking forward to the chore of unloading said vehicles, but thanks to some forward planning, the parents of the groom DID bring a dolly! (And yes...it was on the spread sheet.)

As with most event set-ups, organization was the key. Once all of the decor elements had been located and organized, we noted the placement and set-up of the tables in all three eating areas. The smaller tables were set for four guests per table. Then I realized that the larger tables were set for eight. Clearly guests would be more comfortable with six per table - which was my plan from the beginning. That would mean adding two more tables.

It was time for some tactful negotiations with the manager for our event. I either made my point or wore the poor man down because I got my six per table and the additional two tables. (Those of you who know me well will not be surprised by this outcome.)

We started with the centerpieces and worked our way out to the place settings. The manzanita branches were draped with Spanish moss. Each black lantern contained a small arrangement of silk flowers in a "hammered" double old fashioned glass filled with pebbles. Battery-operated, flickering, votive candles were placed in each pink salt candle holder. The finishing touch for each centerpiece was a different photo of the bride and groom taken over the course of their relationship.
Each place setting began with the pebbled tiles we used as chargers. They were the perfect contrast to the black cloth toppers we used over white table cloths. And on a photographic note, the tablecloth in the photo below right IS actually black...not blue. The venue's black napkins were folded vertically with one of our custom-made napkins on top. The colors in the napkins echoed the colors in the centerpiece and brought a brightness to each place setting. A custom-designed menu card, on neutral-toned card stock, completed the final look.

My next post in this series will highlight the entry table and finishing touches.  We're almost there!

Sunday, May 24, 2015

Rehearsal Dinner Deconstructed: The Plan

I have two things that I use when I am planning an event.

The first is an idea board. This event (and planning) were long-distance so one board was not enough for our constantly changing plans. Whenever something changed or a purchase was made, I changed our boards so that the mother of the groom and I were on the same page and had our ideas in front of us for the next idea or purchase.

As you will see in my next post, the end result did not include as many of the elements we originally thought we wanted to use.  For example:  Black table runners became black toppers, round chargers ended up square, we did not incorporate tin pails, black and white newspaper fabric was exchanged for four different fabric designs using our color palette, and we used white dinner plates instead of black.  We were always open to any new ideas or shopping discoveries.

The second must-have is a spread sheet of every detail. From planning to purchasing to execution, the spread sheet was indispensable. It does take a little time to create your format, but in the end you will be very pleased (not to mention less stressed) because you did it. 

Now for the fun stuff! Let's talk color palette. For this event the color palette was partially predetermined. The mother of the groom had found and purchased some unique, pink salt candle holders with which she had fallen in love. (The color was actually closer to a coral than a real pink.) It was a good start. She also wanted to incorporate touches of mint green - the color of the bridesmaids dresses. The other colors would be chosen to complete the final look.

Having now decided which colors we would build on, we settled down to plan the centerpiece and place settings. We kept our focus on geology, "the South", and the couple themselves. What type of centerpiece would incorporate all of these things?

We knew black lanterns would play a role, as well as rocks, silk flowers and Spanish moss. The picture to the right is the actual picture that was sent as a text to the mother of the groom during a shopping excursion. What could be more fun than a picture of a Joann's shopping cart piled high with elements we would use to create our vision? She just HAD to be a part of it! We knew we wanted to hang the moss from branches, so we looked into using driftwood or live branches. Then I found a website that carried something I had never seen before. Manzanita!
Whether used horizontally or vertically the manzanita branches were perfect.

I wanted to use the black cloth napkins the venue offered, but they needed an accent of some kind since the toppers were black. I chose complimentary fabrics and had some accent napkins made. They would look great and bring out some of the centerpiece colors to each place setting.

The last find was perfect to use as chargers. The mother of the groom had been scouring Atlanta and came across some 12" x 12" pebble flooring tiles. (Don't be afraid to think outside the box when you are looking for table decor. Who would have thought a floor covering store would have the perfect element?) With scalloped edges and a completely different texture at each place setting, they were (and still are) awesome. Even the venue staff commented that they had never seen anything like them used before.  I love that!

All we had left to do was pack the car. The question was..."Would it all fit?"

You will find out in my next post.  Happy Planning!

Friday, May 22, 2015

Rehearsal Dinner Deconstructed: The Venue

If possible, it is always a good idea to check out the venue* when you begin to plan an event.  In this case the rehearsal dinner was conveniently held at the same venue as the wedding.  However, it was in the bride's hometown so I did not have an opportunity to see it in person prior to that weekend.  Fortunately, the mother of the groom had taken pictures of the areas she had rented and sent me some pictures. We had access to both indoor and outdoor areas, and made use of both.

The indoor areas included a long narrow space that gave us access to the cafe.  Several round tables were set up giving guests a view of the river.

We used one corner of that indoor space to set up some comfortable chairs from which to view a slide show featuring pictures of the bride and groom.

Additional round tables were set up in front of the large window, and a welcome table set up in front of the porch entrance.

The outdoor area included a covered porch, access to the indoor cafe, and stair access from the outdoor rehearsal sight.
             
The Low Country Boil buffet was set up in one corner of the porch, and round tables filled in the rest of the area.


*If you ever need a venue in the Columbus, Georgia area check out The Rivermill Event Centre http://rivermilleventcentre.com/. The facilities and grounds are unique and beautiful. The staff for the rehearsal dinner was friendly, professional and went over and above what I had expected.  And, not surprising, the food was delicious!

Wednesday, May 20, 2015

Rehearsal Dinner Deconstructed: The Invitation

The invitation design took on many incarnations before we decided on a final look. We could have sent out only a standard paper invitation, but we wanted something different. Something unique.  Memorable!

The invitation itself was the front and back of 8-1/2" x 11" card stock. Folded horizontally, it comprised both photographs and text and was all about the bride and groom. A photograph from the proposal site (the Grand Canyon) - taken by the groom's father - highlighted a poem by Louis Agassiz that fit the couple and occasion perfectly. We had our cover!                                                                                                                                               The inside text was enhanced by one of the couple's   engagement photos - taken in Louisiana amid tree branches and Spanish moss. The picture on the back was of the happy couple at the Grand Canyon after she said "Yes!" 


In my last post I mentioned geology and "the South" as part of what we wanted to keep in mind when planning this event. That's because both the bride and groom were raised in the South and both are graduate students in the field of geology. Well, the invitation packaging took both of these things into account and was exactly what we wanted. Memorable!

The "Invitation Box" was created! A white divided mailing box was lined, cushioned with Spanish moss and then filled with things you would associate with geology and "the South": homemade pralines by Miss Peggy, the groom's grandmother; Pop Rock Candy; an Energy Crystal; and last, but certainly not least...a Pet Rock (complete with care instructions!). The paper invitation was placed on top of the boxed items, and the boxes were mailed to the wedding party and out of town guests. The boxes were a huge hit. Many recipients commented on the uniqueness of the box. And some of the Pet Rocks were even at the wedding! But then...Pet Rocks DO like to travel. 
In my next post I will highlight the venue and how we arranged the set-up.

Monday, May 18, 2015

Rehearsal Dinner Deconstructed

This time last year, finishing touches were being put on a rehearsal dinner to be held in Columbus, Georgia. The mother of the groom and I had been planning for a few months. In just a few days our plan would become a reality. 

Because we wanted to make the rehearsal dinner as personal as possible for the bride and groom we brought geology, "the South", and the venue together in a cohesive way. As I think back on the process as a whole it could have been daunting. Surprisingly, it wasn't. It was a special time filled with fun and excitement.


The next few posts will highlight and detail some of the elements 
that went into the planning and execution of this special event.
  
  Many thanks to the groom's parents, Dick and Wendy, 
and to the bride and groom, 
Shannon and Crawford, for allowing me to do this series of posts.  

Wednesday, May 13, 2015

Girl? or Boy?

My precious niece is expecting her first child! She wanted to announce the sex of the baby at a get-together for family and friends. As luck would have it the date of the "revealing" sonogram coincided with an annual family fish fry in May. I offered to put together some extras to make the day a little more special. My plan was driven by a desire to keep the decor low-key and tasteful, yet complimentary to the outdoor occasion.

Oh! I should mention that my niece and her husband wanted to wait until the fish fry to be surprised with everyone else.  So Nurse Angela called ME after the sonogram was completed to tell me whether the baby is a girl or a boy. Now THAT is fun!

I looked online for some inspiration. I had some thoughts, but you never know what you might come across. I knew I didn't want it to be something that thousands of other people had done, and I certainly didn't want it to turn into a circus with the great-grandparents in attendance.  I do believe I accomplished my goal.

I used the motif of Silhouettes.  I found silhouettes of a little boy and a little girl and took it from there. A neutral color palette of taupe, black and white was perfect for the decor and invitations. 

Boxes covered with craft sticks and painted white were a nice base on which to place the silhouettes.  Add some Spanish moss, a little greenery, jute and white ribbon bows and the look was complete.

The knives, forks and spoons were wrapped in layered black and white napkins - tied with jute or secured with paper bands of the same taupe and white stripe used on the invitations and silhouettes.  The wire baskets were a last minute find at Dollar Tree. Perfect!

The grandmother-to-be dotted some hydrangeas around the eating area which added pops of color in traditional pink and blue. My niece set up a table on which we placed sonogram pictures and a prediction sheet for everyone to sign. The white box held the secret that only three of us knew.

        
After lunch the box was opened and...drum roll...the baby is a GIRL! During the excited conversation that followed, favor boxes were distributed and opened. Inside were a decorated flower cookie, Hershey's "It's a Girl!" kisses, seeds for pink flowers to be planted in honor of the little one and a pink balloon...of course! (Thank you, Aunt Lynn and Aunt Peggy!) Congratulations, Sarah and Dustin!  We are looking forward to meeting our precious little princess when she makes her grand (and royal) appearance.
    

P.S.  We already have the perfect idea for a baby shower.  Stay tuned!